Donald Bailey,
July 16, 2007
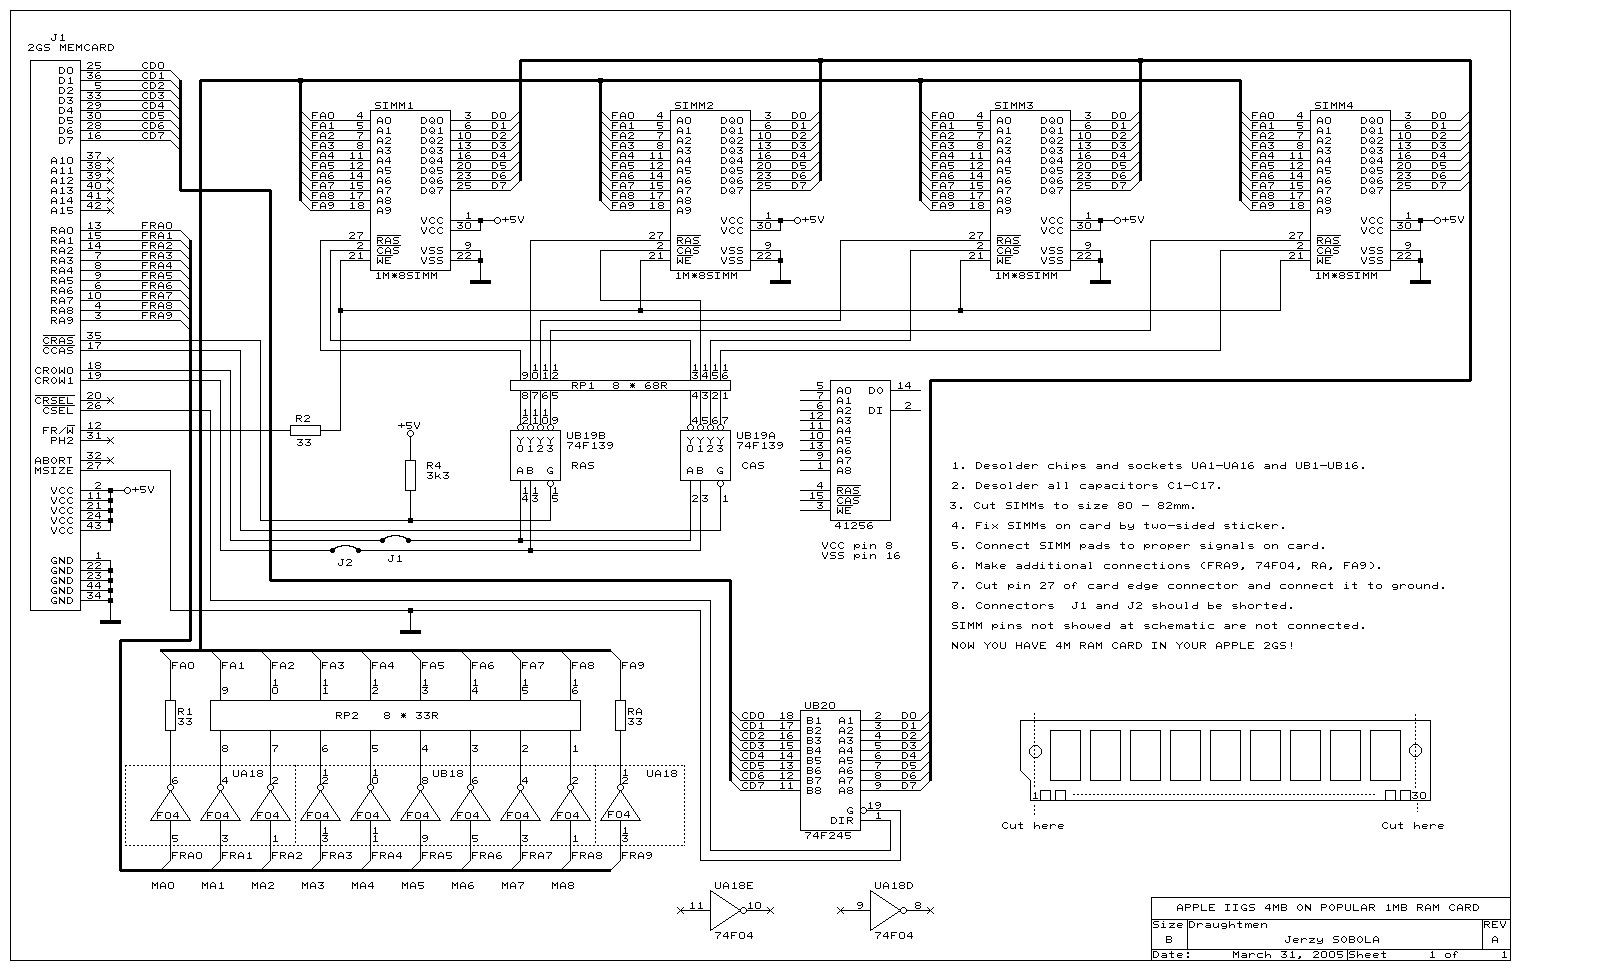
I found a web site in a post on comp.sys.apple2 that described (probably through a computer translator) how to modify a 1MB card inot a 4MB card with photos and a schematic. I have an electronics background and have done a number of hobby projects with a //e I had years ago. When I was in high school being a geek I really enjoyed doing science fair projects. Grade 10 I added LEDs to a Fisher Price house to demonstrate home automation. Grade 11 I designed a 65C02 co-processor for my //e and grade 12 I set up a HO scale train with a (cough cough) Vic 20 to speed up/slow down, switch tracks, and change directions. I actually won and award for that one.
So skipping ahead more than a number of years, I nearly paid $200US for a 4MB ram expansion card for my IIGS on eBay and I haven't had any alternatives to expand memory at the time, partly because my wife has been monitoring my eBay usage. So I thought it would be cheaper to modify a 1MB card into a 4MB card. I bought two 1MB cards: one to modify and another as a spare in case the other ended up dead.
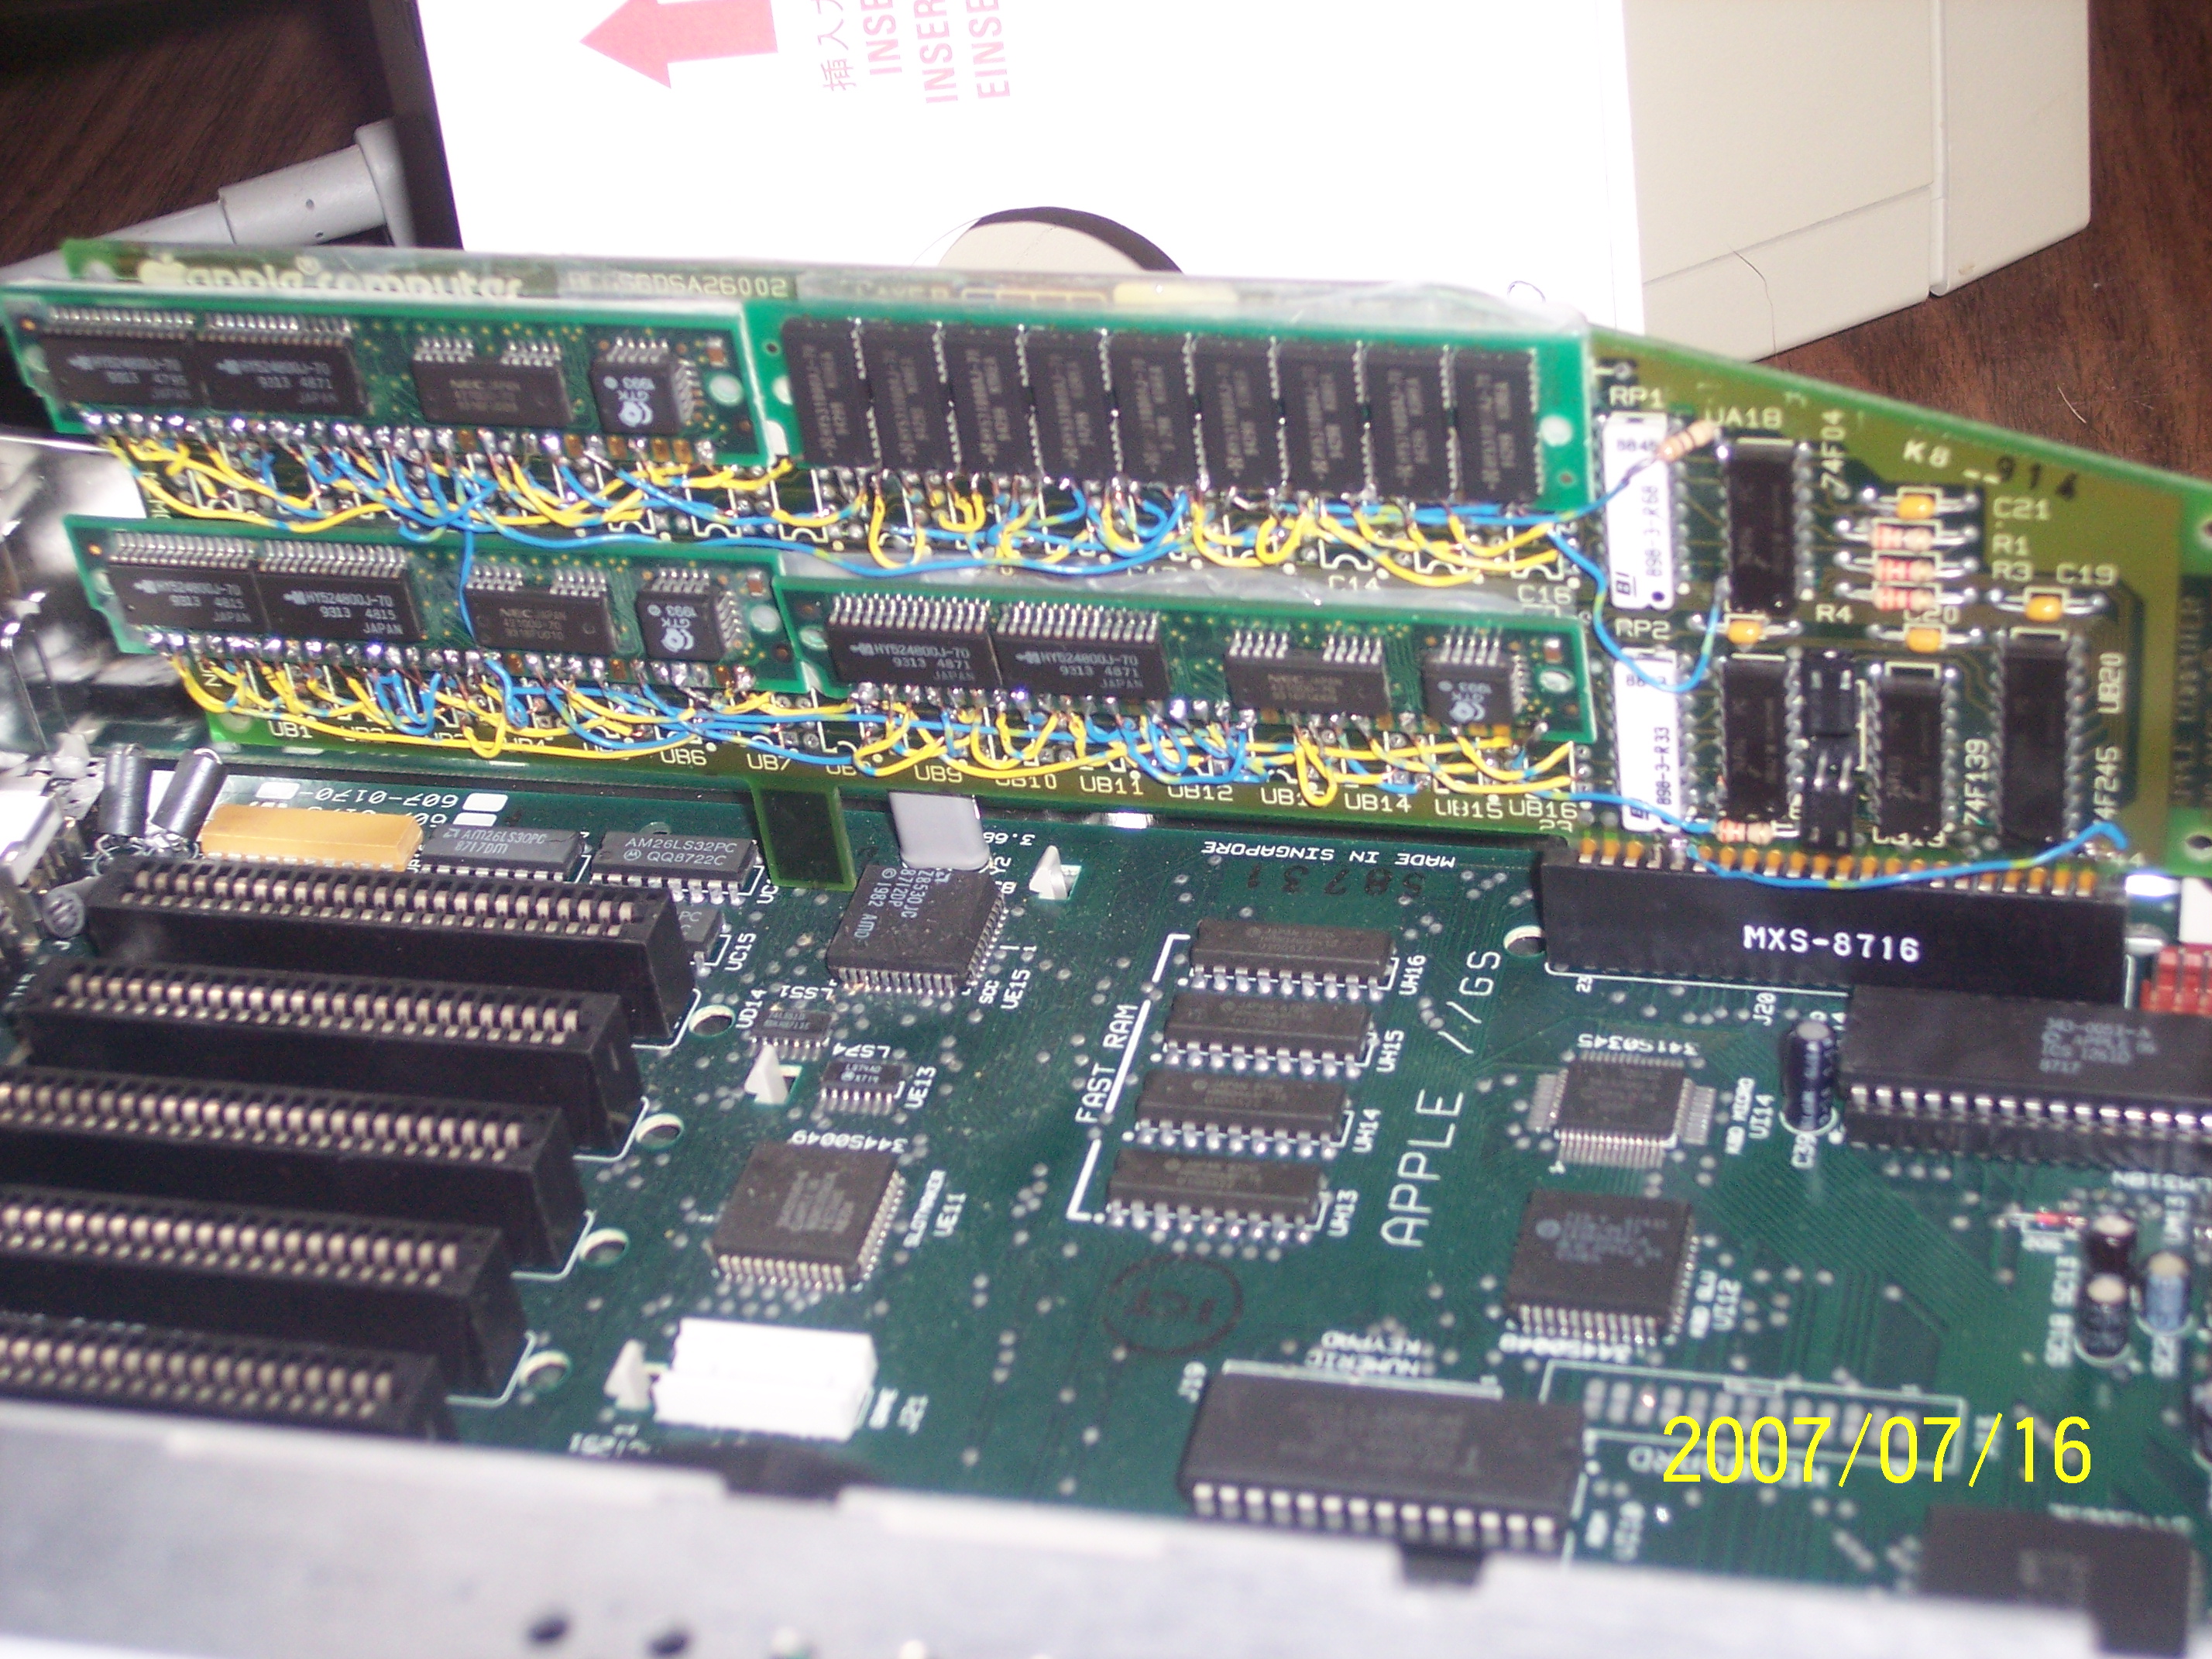
After about six hours of work desoldering all the chips, sockets, and capacitors, and adding the SIMMs, wires, and a resistor, I've got a working card on my first attempt.
There is one ambiguity between the schematic and the original site's instructions, and that was that pin 27 on the memory card must be cut from the trace on the board, and then pin 27 must be grounded. The schematic shows pin 27 grounded but still connected. The computer would not power up with pin 27 grounded but not cut. Also, the photos on the original site show what looks like wires soldered between through holes that the original 41256 chips sat in. What is actually shown is 28awg wire threaded right through the through holes from the back to the front of the board to make the connections. This was rather convenient. Just have to watch that when pulling the wires through the through holes that you don't accidentally strip the wire as you're doing it or it will short to the through hole giving undesireable results.
Forgive my soldering job in the photos as the iron I have has a 1/8" tip. It made things interesting. I did use a Hakko desoldering tool which made the IC/socket removal a snap.
The link to the original site that I found this modification on is http://www.apple2gs.republika.pl/eng.html
Photos below link to a higher res photo, 2.8MB each.
Feel free to contact me if you have any questions: donnie at apple2pl dot us is my e-mail.
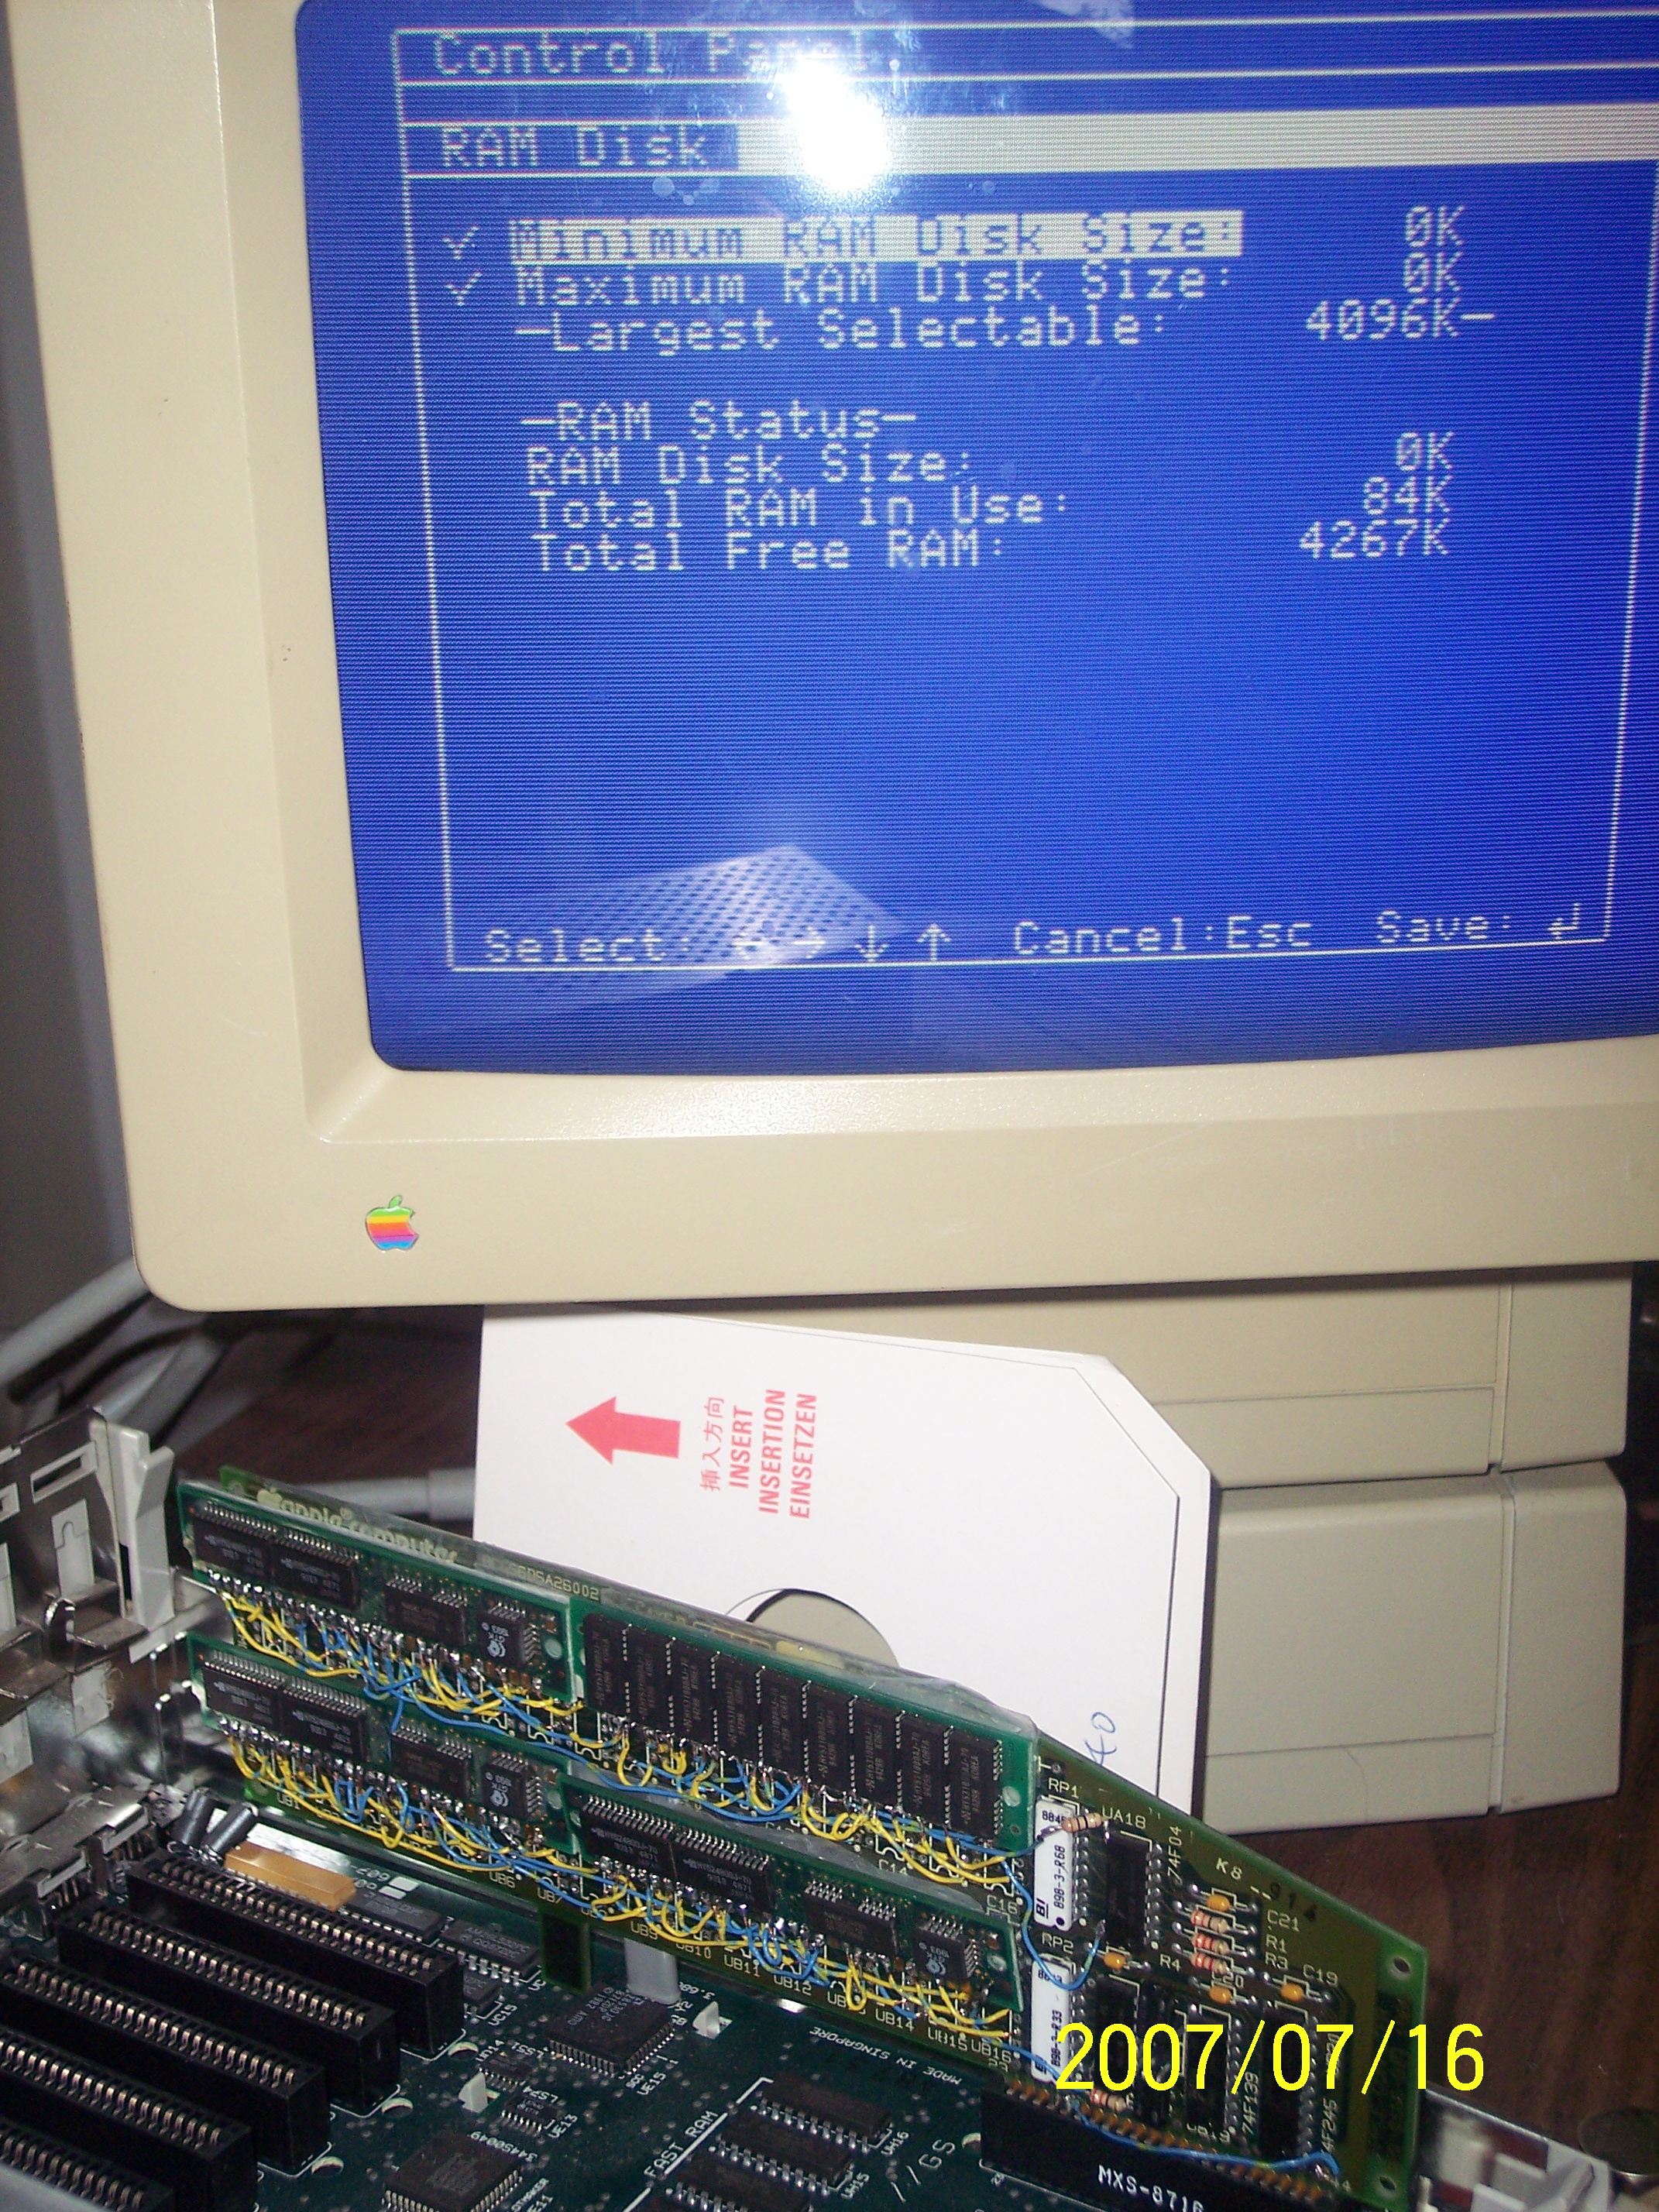
Screen shot with card:
Just the card: